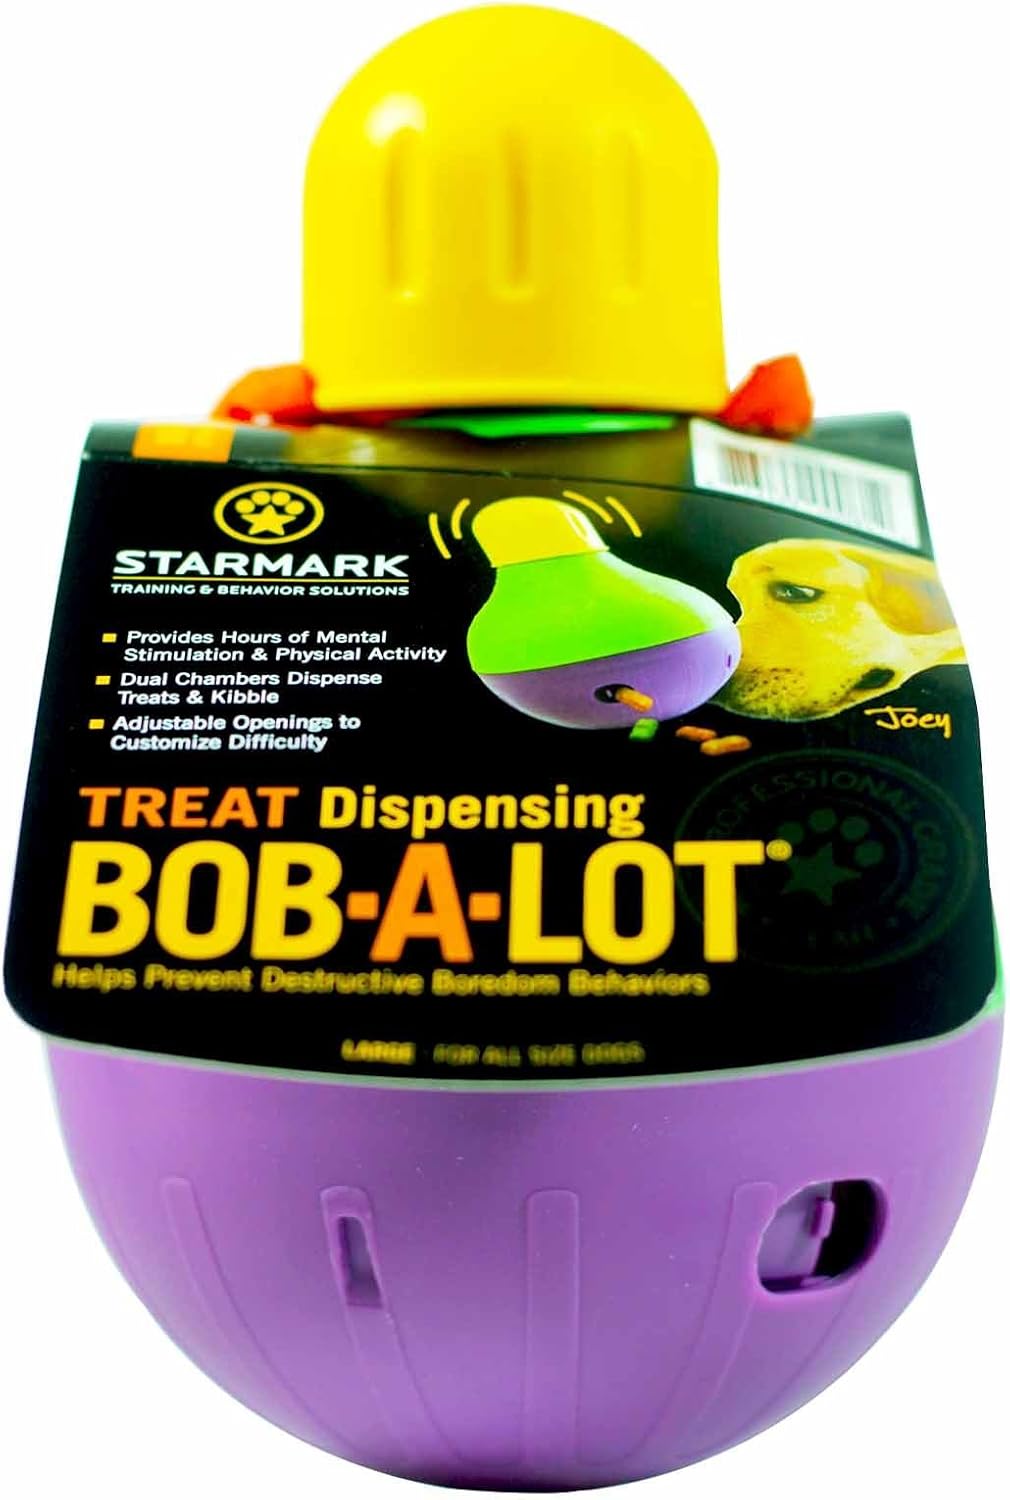
Starmark Bob-a-Lot Interactive Dog Toy, Green, Large
FREE Shipping
Starmark Bob-a-Lot Interactive Dog Toy, Green, Large
- Brand: Unbranded

Description
A gorgeous natural bob that is simple but makes a lot of impact. When recreating at home, have fun with this style and add a small braid or clips throughout to add a touch of femininity. Bobs with bangs Hear John Mayer, Bob Dylan Performances With Wynton Marsalis". Rolling Stone. 2018-02-21 . Retrieved 2021-04-15. Cover versions of It Takes a Lot to Laugh, It Takes a Train to Cry by Lucinda Williams | SecondHandSongs". secondhandsongs.com . Retrieved 2021-04-13.
bob hairstyles we love to inspire your next cut in 2023 51 bob hairstyles we love to inspire your next cut in 2023
An earlier, alternate version of the song has been released, in different takes, beginning with the appearance of one take on The Bootleg Series Volumes 1–3 (Rare & Unreleased) 1961–1991 in 1991. Bob is given the job to help Dr. Mountfitchet renovate an old castle but a mix-up leaves his father Robert in charge resulting in one disaster after another. Will the castle be finished and will Bob and his Dad get along?I've been thinking about buying one of these for Ruby too. I recently got her a Buster cube which she loves (or seems to anyway ). I wouldn't get a wobbler from Petbarn though- more than triple the price as in the States! :D Item number VNRZP Rosewood Treat Dispensing Bob-A-Lot Small Pet ToyThe Bob-A-Lot wobbles and bobbles dropping treats as it goes. It has adjustable openings to customise difficulty, providing a good interactive challenge. The words "Ye Ende" appear, kind of like a language of "The End". This is due to it being a medieval term. Cover versions of It Takes a Lot to Laugh, It Takes a Train to Cry by Paul Westerberg | SecondHandSongs". secondhandsongs.com . Retrieved 2021-04-13.
Starmark Bob-a-Lot Interactive Dog Toy, Green, Large
Dylan played it live as part of his set in the August 1971 Concert for Bangladesh. This version was included in the concert film and Grammy Award-winning album of the same title. [2] Providing mentally stimulating dog toys and adequate exercise may be all you need to do to calm a hyper pooch or curb behavior trouble. The StarMark Bob-A-Lot dog toy can provide many hours of dog-friendly fun for pups that are food motivated. It's suitable for all breeds and sizes, and would be ideal for multi-dog homes. StarMark Bob-A-Lot Interactive Dog Toy Review Cover versions of It Takes a Lot to Laugh, It Takes a Train to Cry by Steve Stills | SecondHandSongs". secondhandsongs.com . Retrieved 2021-04-13. The StarMark Bob-A-Lot dog toy comes in two sizes. I show the small size in this review. The smaller size holds about 1 cup of food and the larger size holds up to 3 cups of food. The white bag seen next to the chair that Robert sat looks like Postman Pat's satchel that he used to deliver the post in Greendale from the two seasons and four specials.
Face shape: This is where most people go wrong (and end up wondering how to fix a bad bob haircut"If you have a round face, then something lighter and layered is more flattering,” says Irwin, “if you have an oval face, long layers work well to lift, especially with a fringe." For square face shapes, legendary stylist Adam Reed recommends long bobs with soft layers, and for heart face shapes, “keep the front section longer to highlight the jawline.”
Rosewood Treat Dispensing Bob-A-Lot Small Pet Toy
I have the Bob a Lot! Its biggest pro for me is the durability as very few things survive one of my dogs. There are teeth marks gnawed all over the top, but it works just fine and he's never been able to unscrew it or damage the main part. It's great that you can adjust it in two places for ease of access/difficulty. I use it mainly to tire out my dog. Limited. Authorised and regulated by the Financial Conduct Authority. Sales arranged by Direct Group Erlewine, S.T. "The Bootleg Series, Vol. 5: Bob Dylan Live 1975 – The Rolling Thunder Revue". AllMusic . Retrieved 2014-09-02. This is the first special not to have a Japanese dub. Instead, Robert made his Japanese dub debut in the Bob the Builder: Project: Build It episode ' Where's Robert?'.As this was the first special released in the US, there was a continuity error for original US viewers of Scoop switching between his new and old mouth plates as A Christmas To Remember was produced first.
The Knights of Can-A-Lot | Bob The Builder Wiki | Fandom The Knights of Can-A-Lot | Bob The Builder Wiki | Fandom
Cover versions of It Takes a Lot to Laugh, It Takes a Train to Cry by Taj Mahal | SecondHandSongs". secondhandsongs.com . Retrieved 2021-04-13. The costs for delivery, installation services and monthly insurance products cannot be placed on BNPL. You can use most treat dispensing toys as a slow feeder as well. You can place your dog's kibble inside, which means he'll have to work for his meals. This helps to slow down fast eaters and provide mental stimulation for your pet.This version was recorded on July 29, 1965, the same day that Dylan also recorded " Positively 4th Street" and " Tombstone Blues". [4] Musically, the song has a lazy tempo driven by lazy-slap drumming with a shuffling beat and slight emphasis on the offbeat from session drummer Bobby Gregg. [2] [5] There is also a barrelhouse piano part played by Paul Griffin, a raunchy bass part played by Harvey Brooks, an electric guitar part played by Mike Bloomfield and an unusual harmonica part. [2] [5]
- Fruugo ID: 258392218-563234582
- EAN: 764486781913
-
Sold by: Fruugo